In this project, we are going to use a combination of GitHub Pages and Jekyll to create an updatable (“live”) resume in the form of a static website. We are using GitHub Pages for the site hosting (for free!) and Jekyll for the static site generation.
Prerequisites
- A GitHub account
- A personal device (or Raspberry Pi) with the following installed/configured:
GitHub Pages
- Create a new public GitHub repository
- Name the repository based on the URL that you would like your site to be available at:
- (option 1) https://username.github.io - name it exactly
<username>.github.io - (option 2) https://username.github.io/repository - name it the subdirectory that your site will be available at (e.g.
pages-demo) - (option 3) Custom domain: If you intend to use a custom domain, choose the second option, and we will configure the custom domain later on
- (option 1) https://username.github.io - name it exactly
- Name the repository based on the URL that you would like your site to be available at:
- Create a test file.
-
Name the file
index.html, input some text content (e.g.<h1>Can you see this?</h1>), and commit your changes.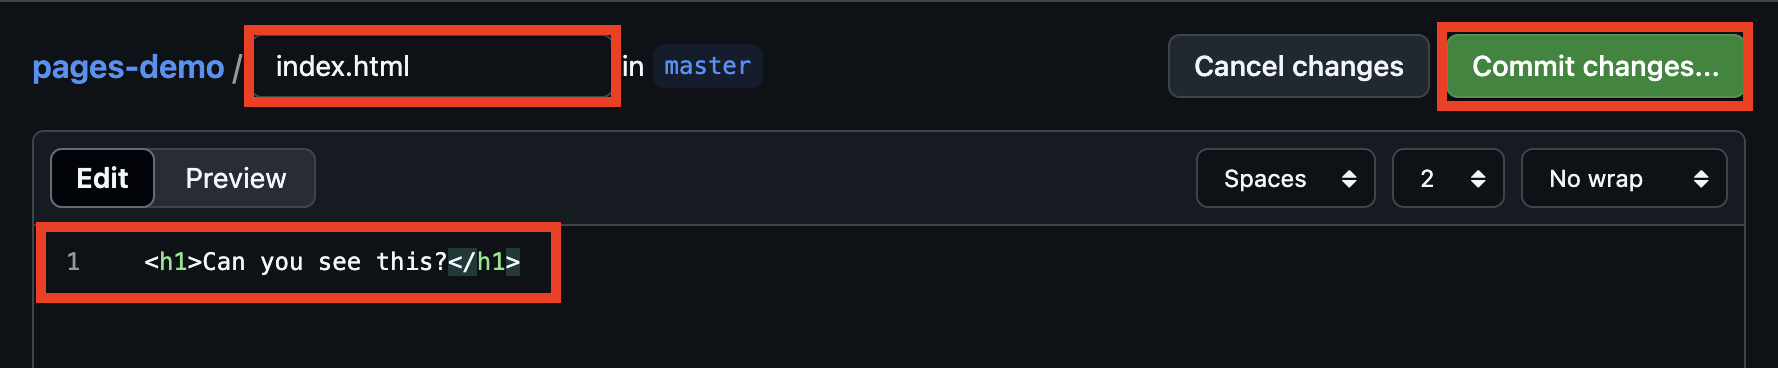
Note: GitHub pages will look for a
index.html,index.md, orREADME.md. You could create any one of these. -
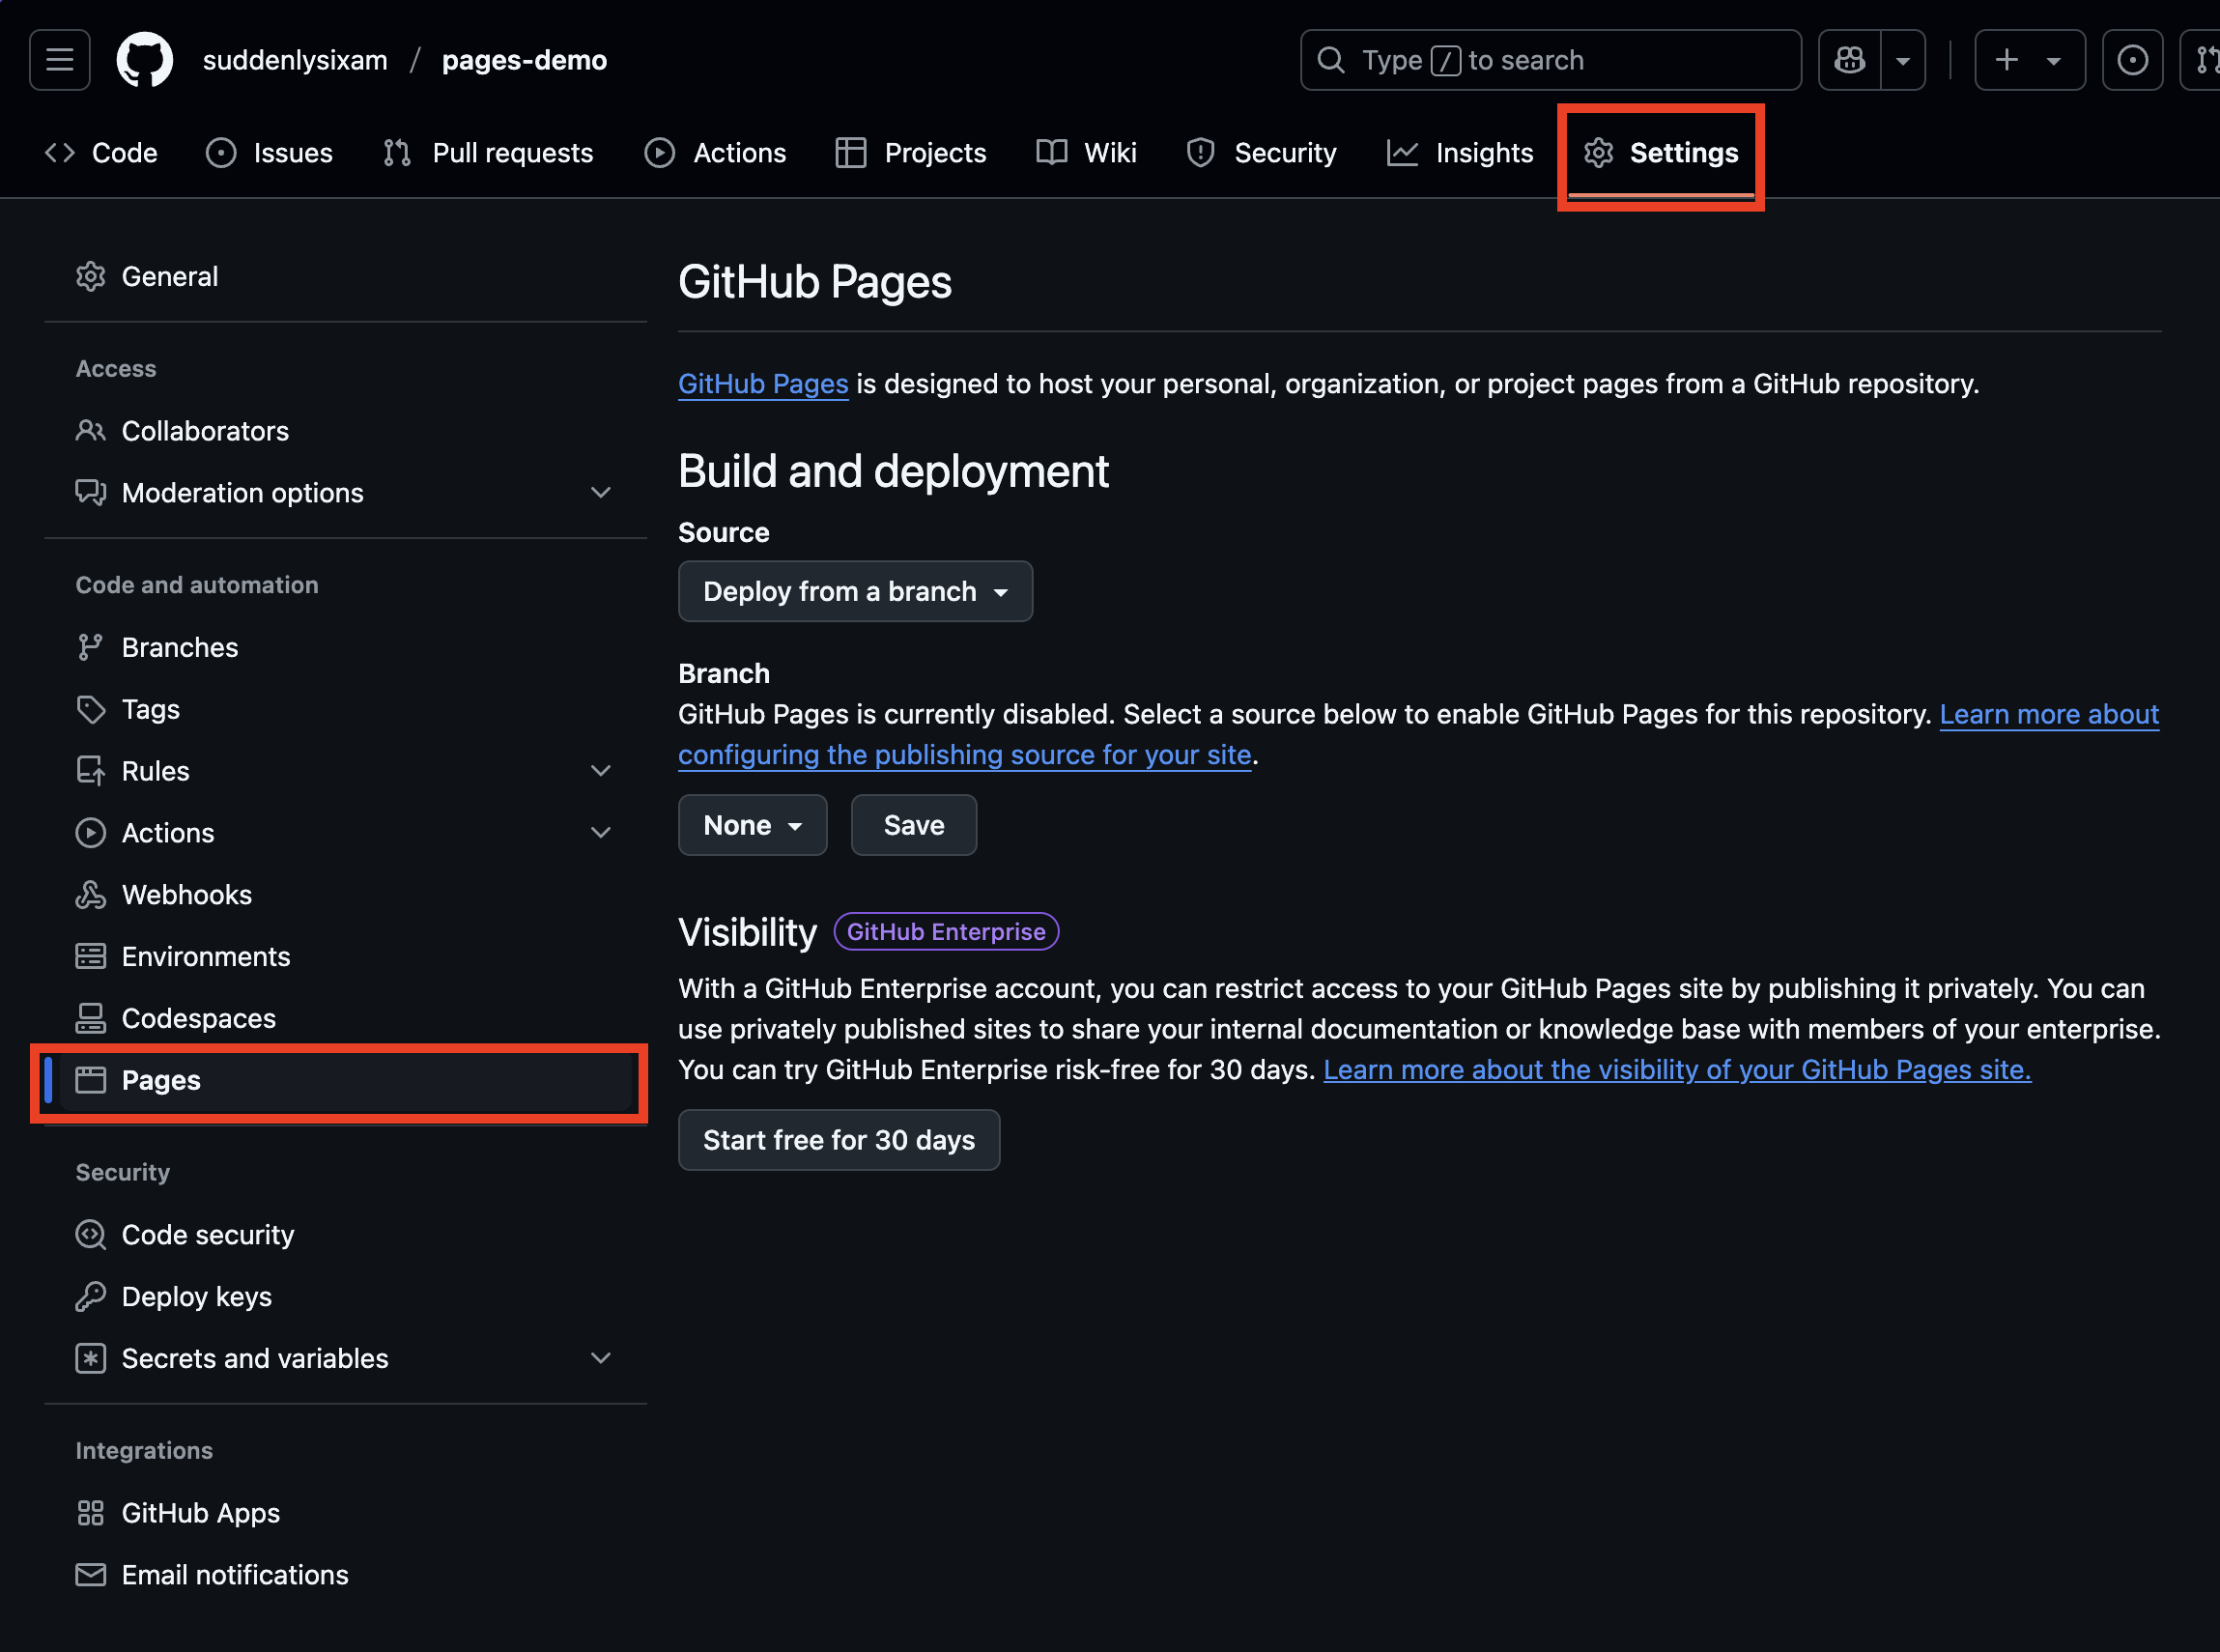
- Configure the repository
-
Navigate to the repository Settings and then to the Pages section.
- Under Branch
- Click the drop down and select the
masterbranch (or a different branch if you desire) - Once a branch is selected (or if one was already selected by default), a second dropdown will appear. With this you can configure the publishing source: the path in your repository that site will be served from. We are going to leave this as
/ (root).- Note: If you change the publishing source, you will also need to change the folder than your test file or other content is located in.
- Click Save.
- Click the drop down and select the
- (optional) Configure a custom domain.
-
Is it working?
-
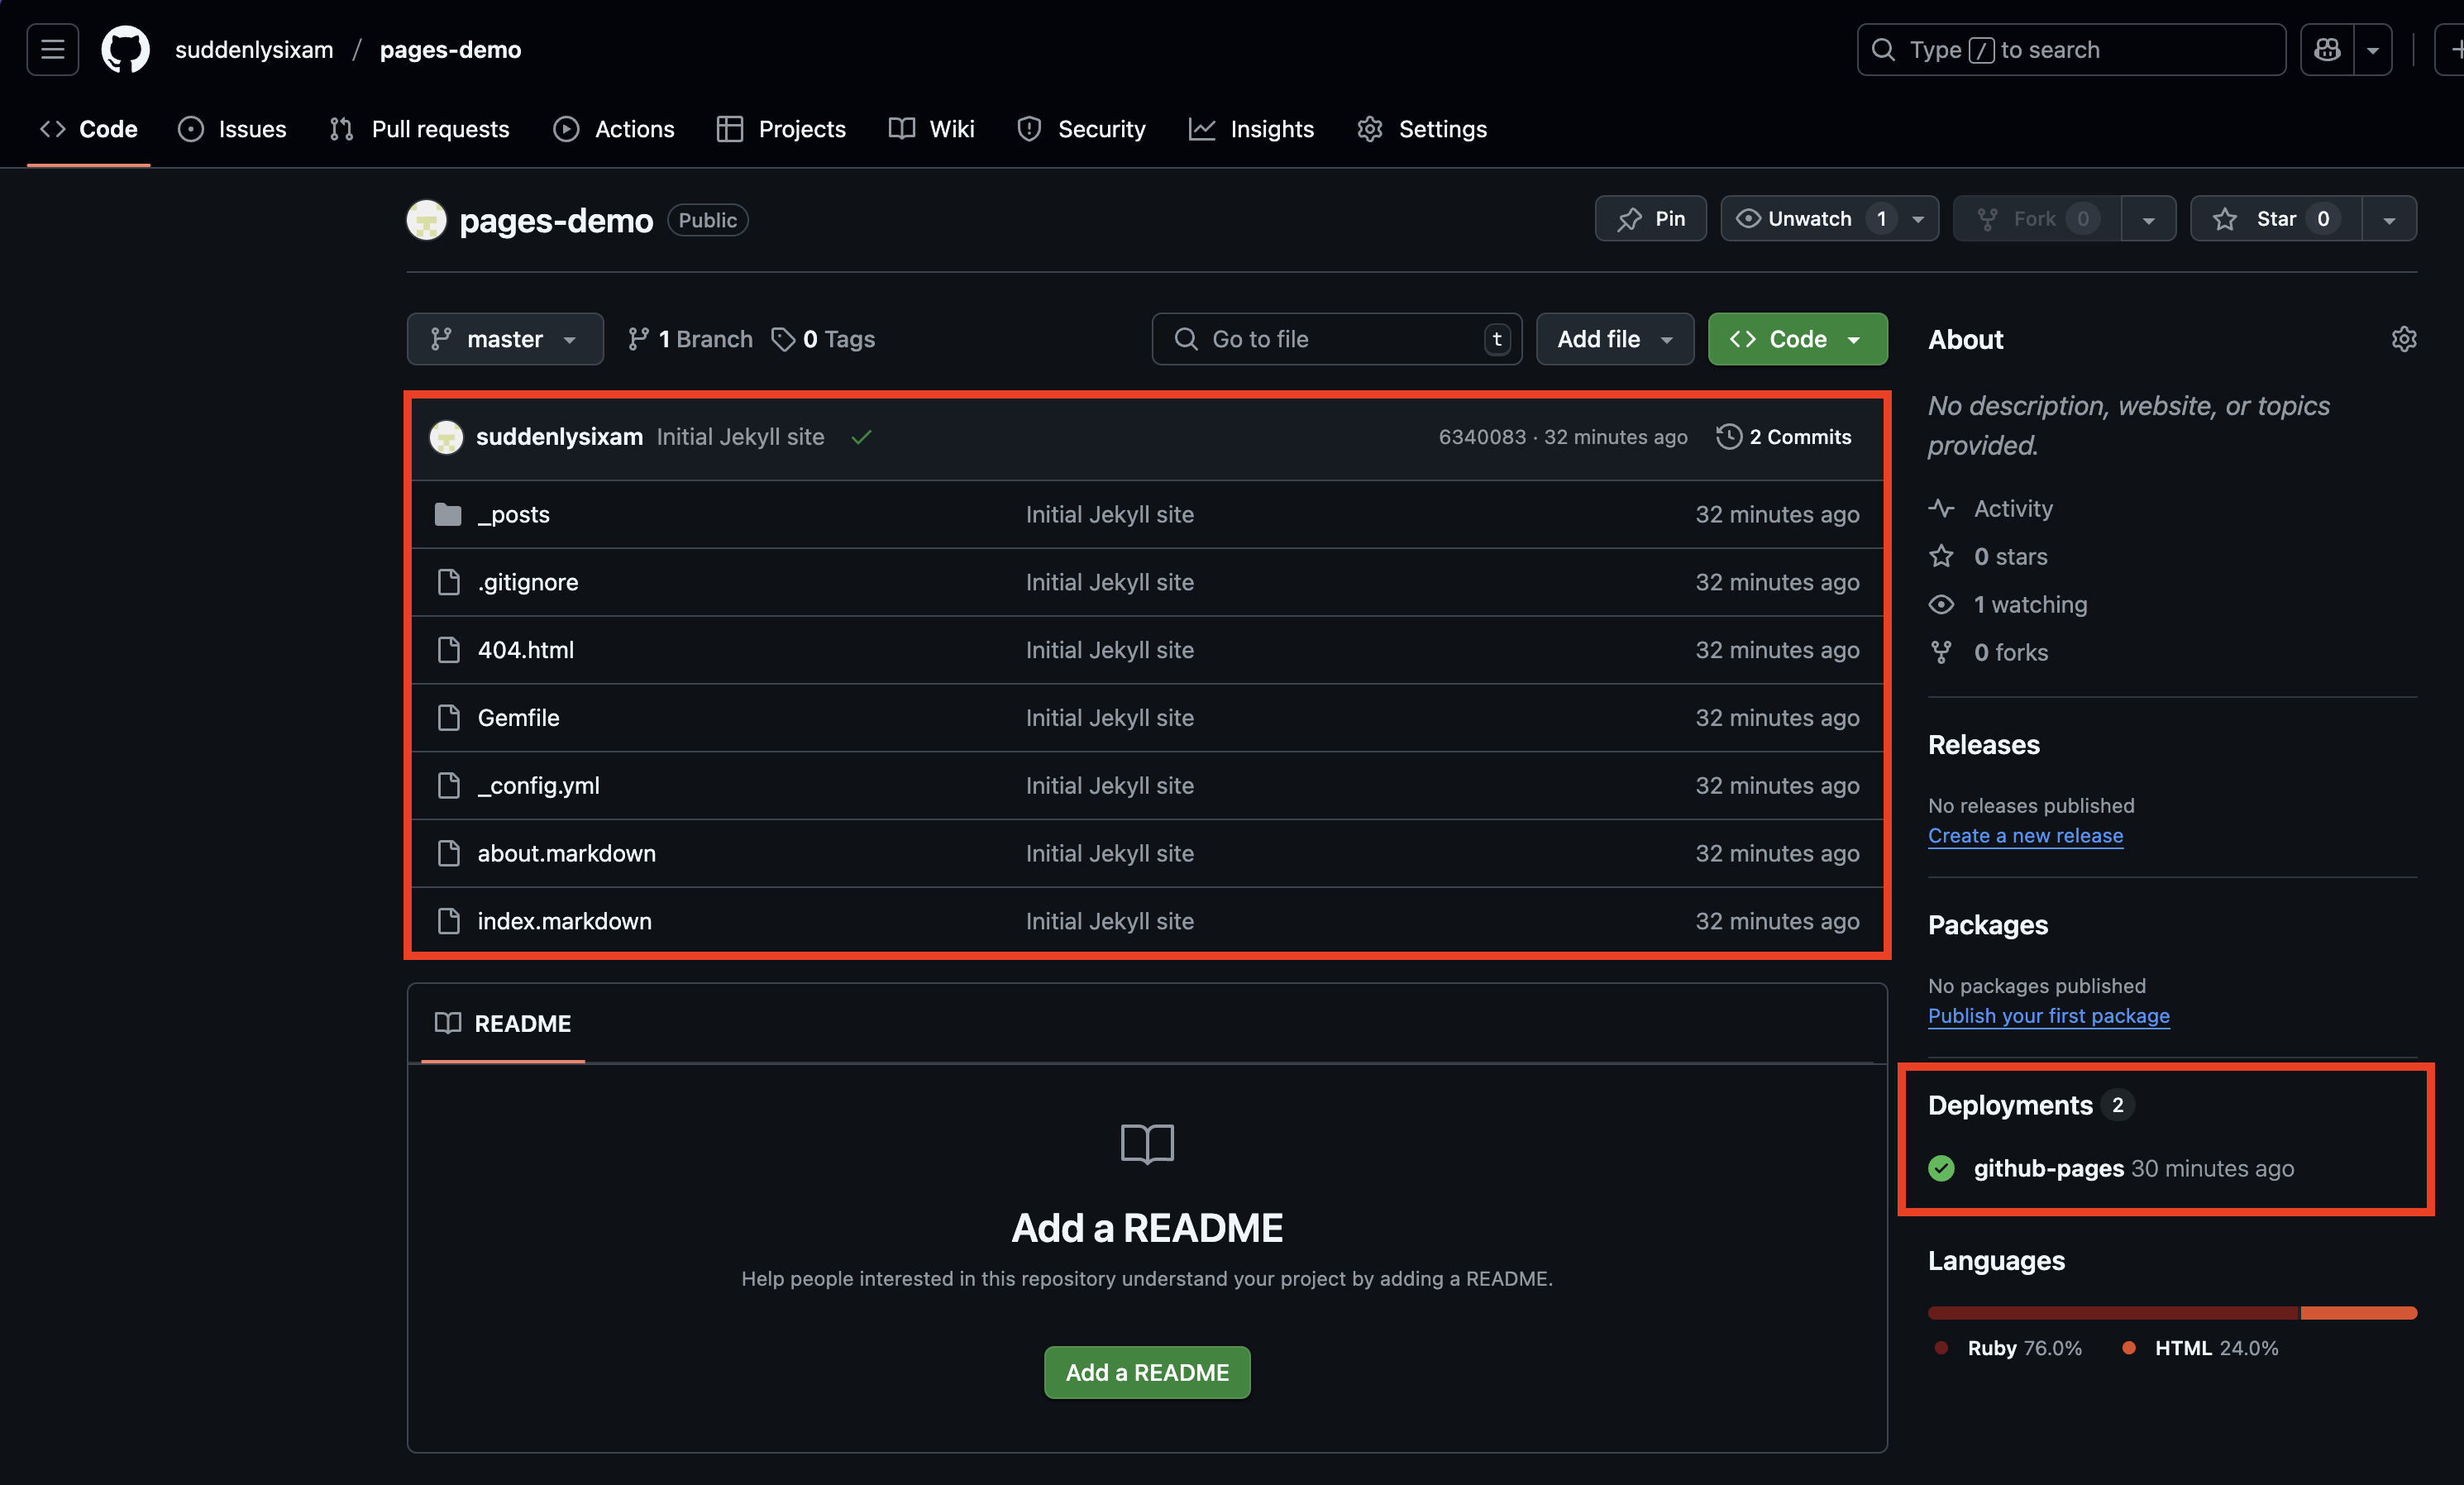
Navigate back to the main Code page. Check the Deployments section. It should have a green checkmark with either time now or some value of minutes ago. This represents the last time new changes were built & deployed.
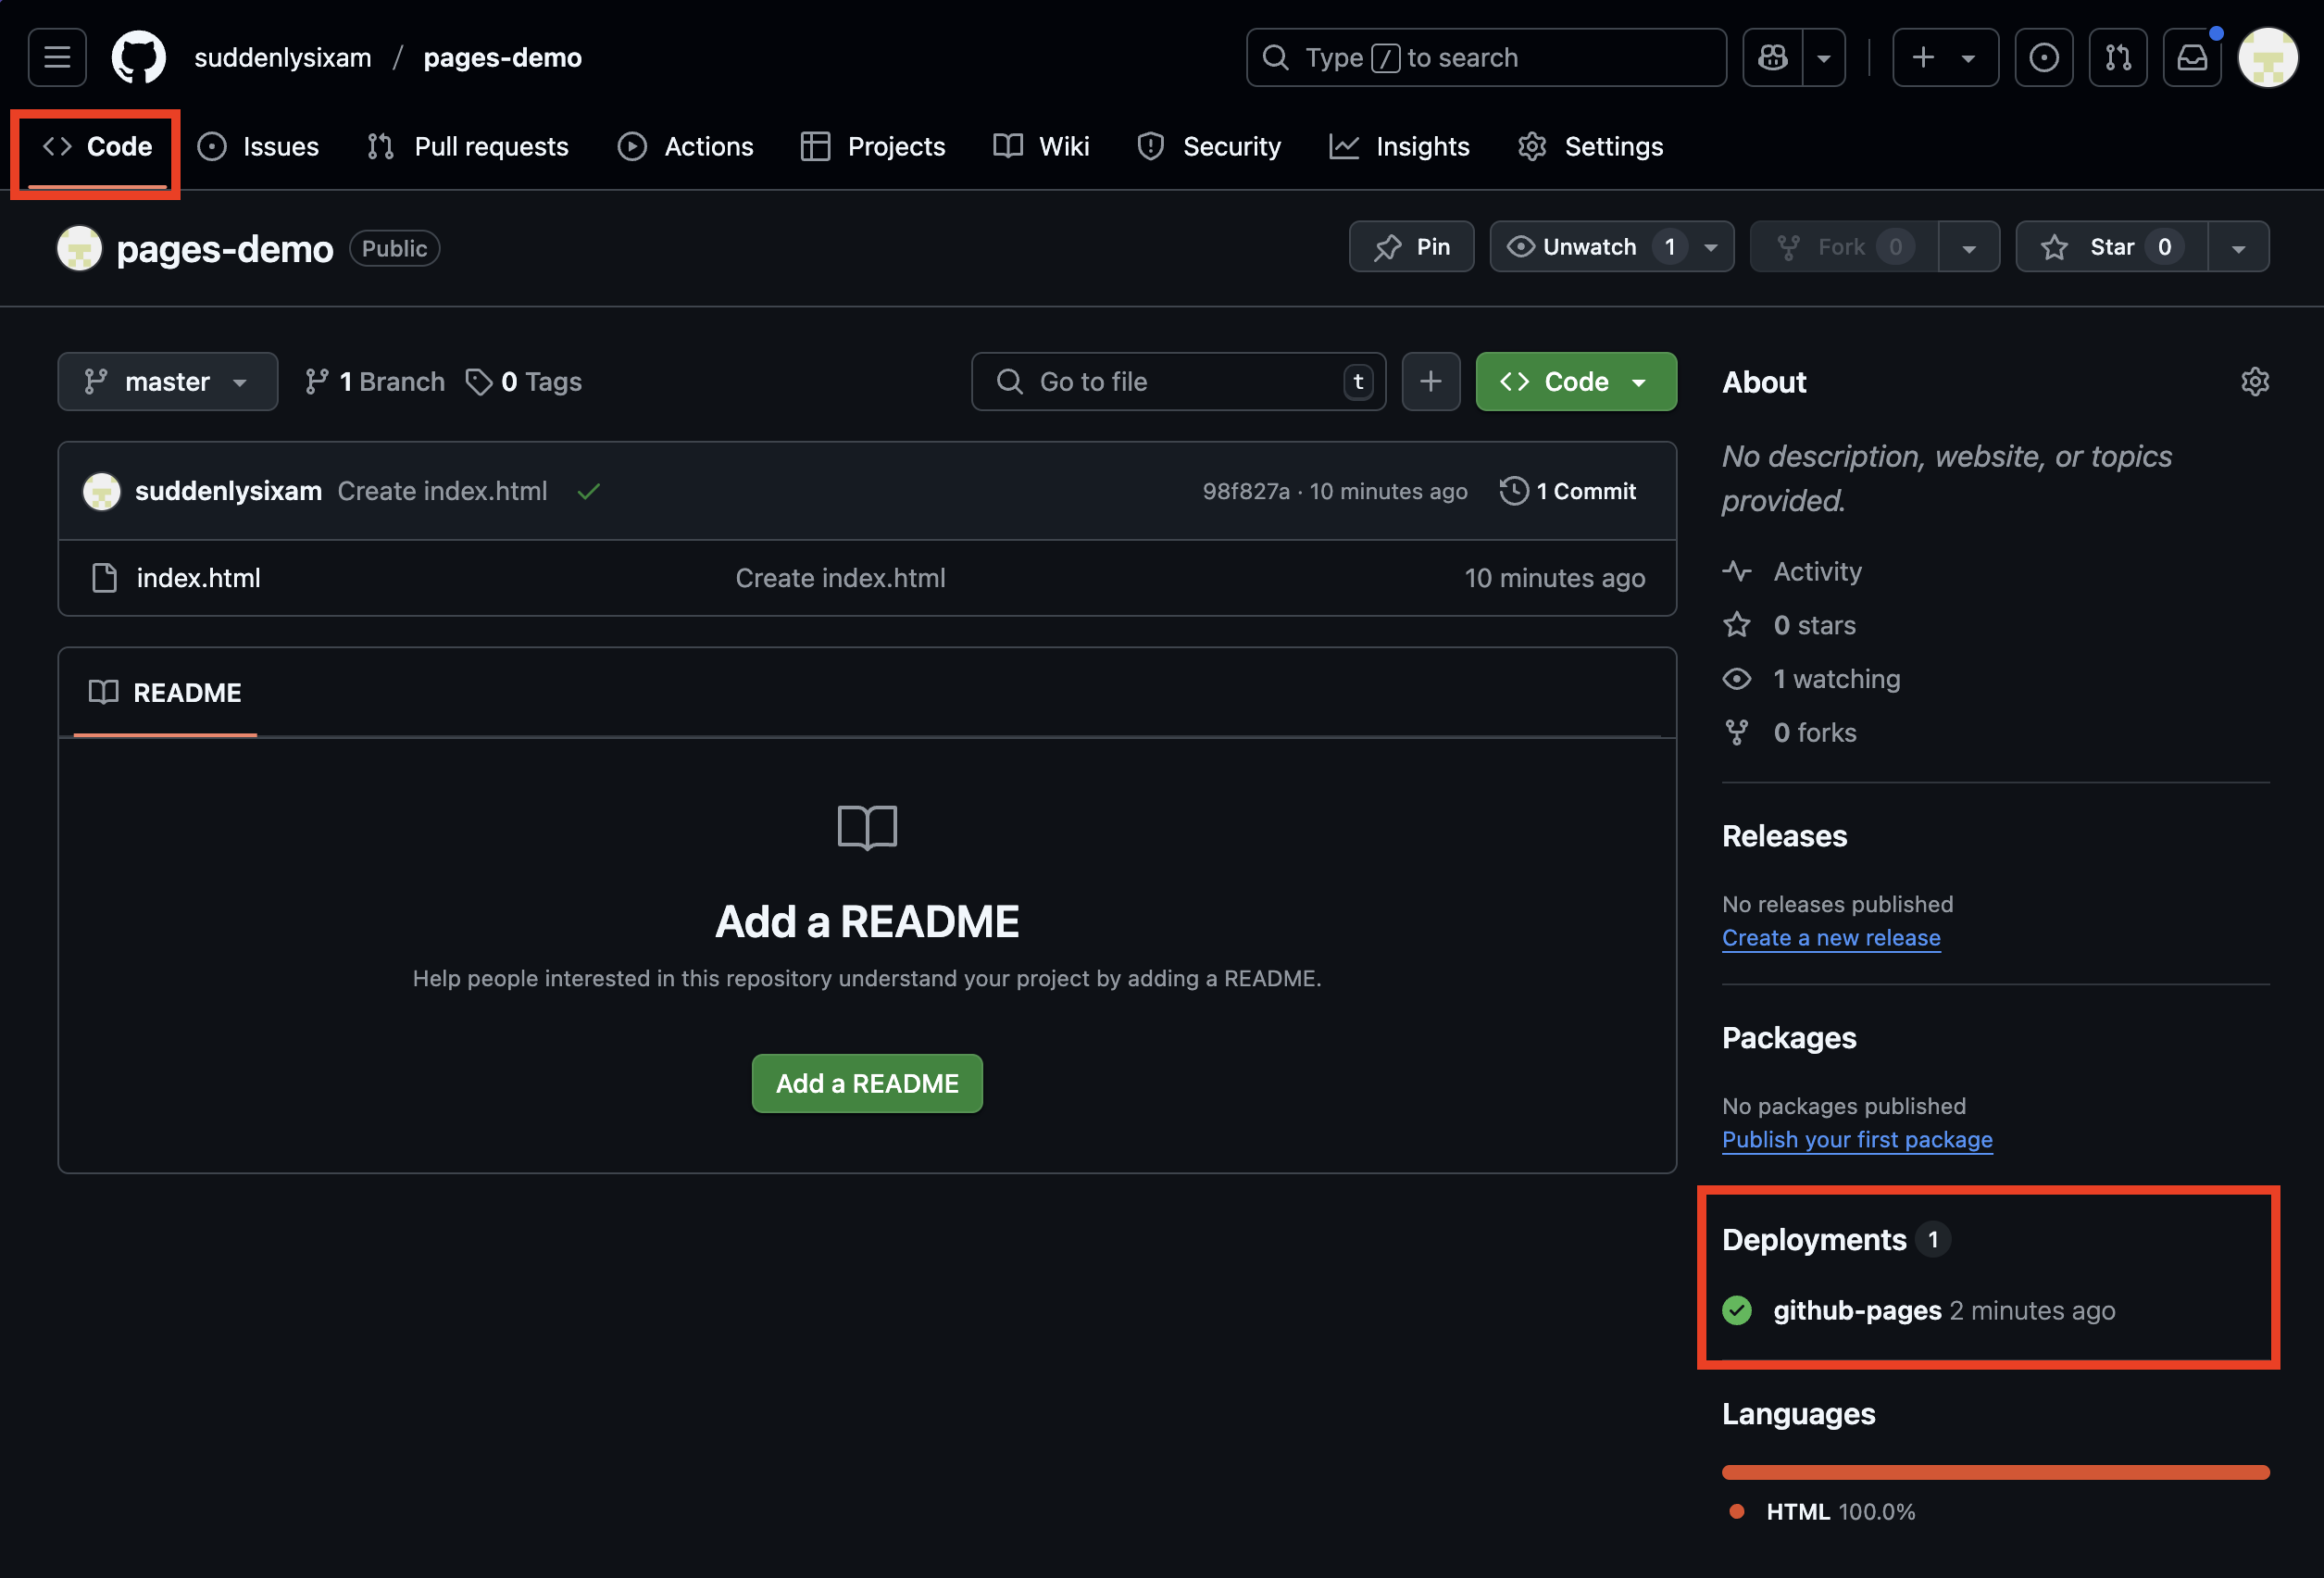
Note: You can also see the history of your deployments and other GitHub Actions workflows under the Actions tab.
-
In a new tab, navigate to the URL that you chose & configured (e.g. https://suddenlysixam.github.io/pages-demo/), and if everything has been done correctly you should see the test text that you entered in your
index.html.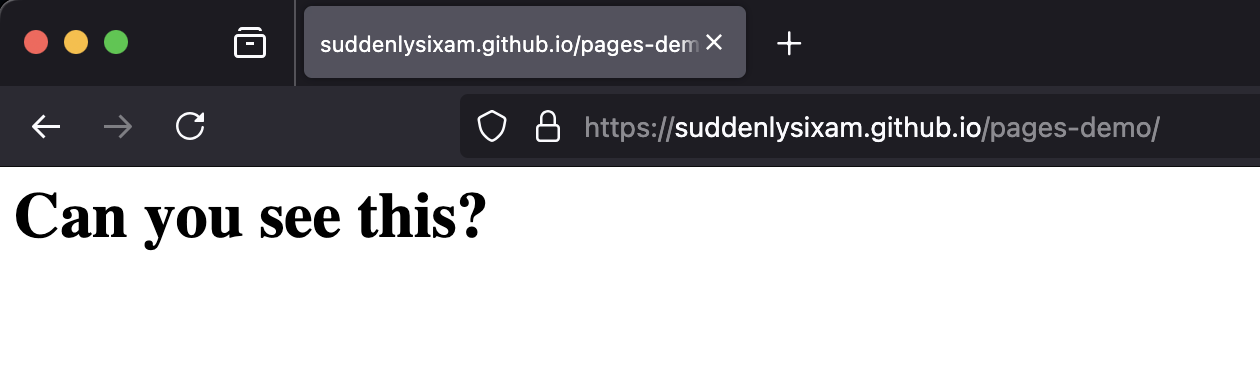
Hooray! You’ve learned how to configure a GitHub Pages site. But the content we have tested with so far leaves something to be desired, so lets work on building a proper site next.
Jekyll
Jekyll is a static site generator with built-in support for GitHub Pages. We are going to be working with Markdown, HTML, Liquid, etc. as a part of this.
This assumes that you have a personal device with Jekyll & Git installed and configured. See the Prerequisites.
Basics
-
Clone the repository that you configured for GitHub Pages earlier.
(e.g.
git clone [email protected]:suddenlysixam/pages-demo.git) -
Remove/delete the test file that we created earlier
(e.g.
rm index.html) -
Create a new Jekyll site.
jekyll new --skip-bundle .A number of files will be created.
bash-3.2$ jekyll new --skip-bundle . New jekyll site installed in /Users/meganst/devel/suddenlysixam/pages-demo. Bundle install skipped. bash-3.2$ ls -a . .. .git .gitignore 404.html Gemfile _config.yml _posts about.markdown index.markdown bash-3.2$ - Edit the
Gemfilefile that was created- Add a
#to the beginning of the line that starts withgem "jekyll"to comment out this line. - Modify the line that starts with
# gem "github-pages"- Remove the
#at the beginning of the line to uncomment out the line. -
Modify the line to look like the following, replacing GITHUB-PAGES-VERSION with the latest supported version of the github-pages gem found here.
gem "github-pages", "~> GITHUB-PAGES-VERSION", group: :jekyll_pluginse.g.
gem "github-pages", "~> 232", group: :jekyll_plugins
- Remove the
- Add a
-
From the command line, run:
bundle install -
Edit the
.gitignorefile that was created, and add the following line:Gemfile.lock -
Edit the
_config.ymlfile that was created based on the site you are creating.e.g.
title: Pages Demo url: https://suddenlysixam.github.io baseurl: /pages-demo # the subpath of your site, e.g. /blog github_username: suddenlysixam # Build settings theme: minima plugins: - jekyll-feed -
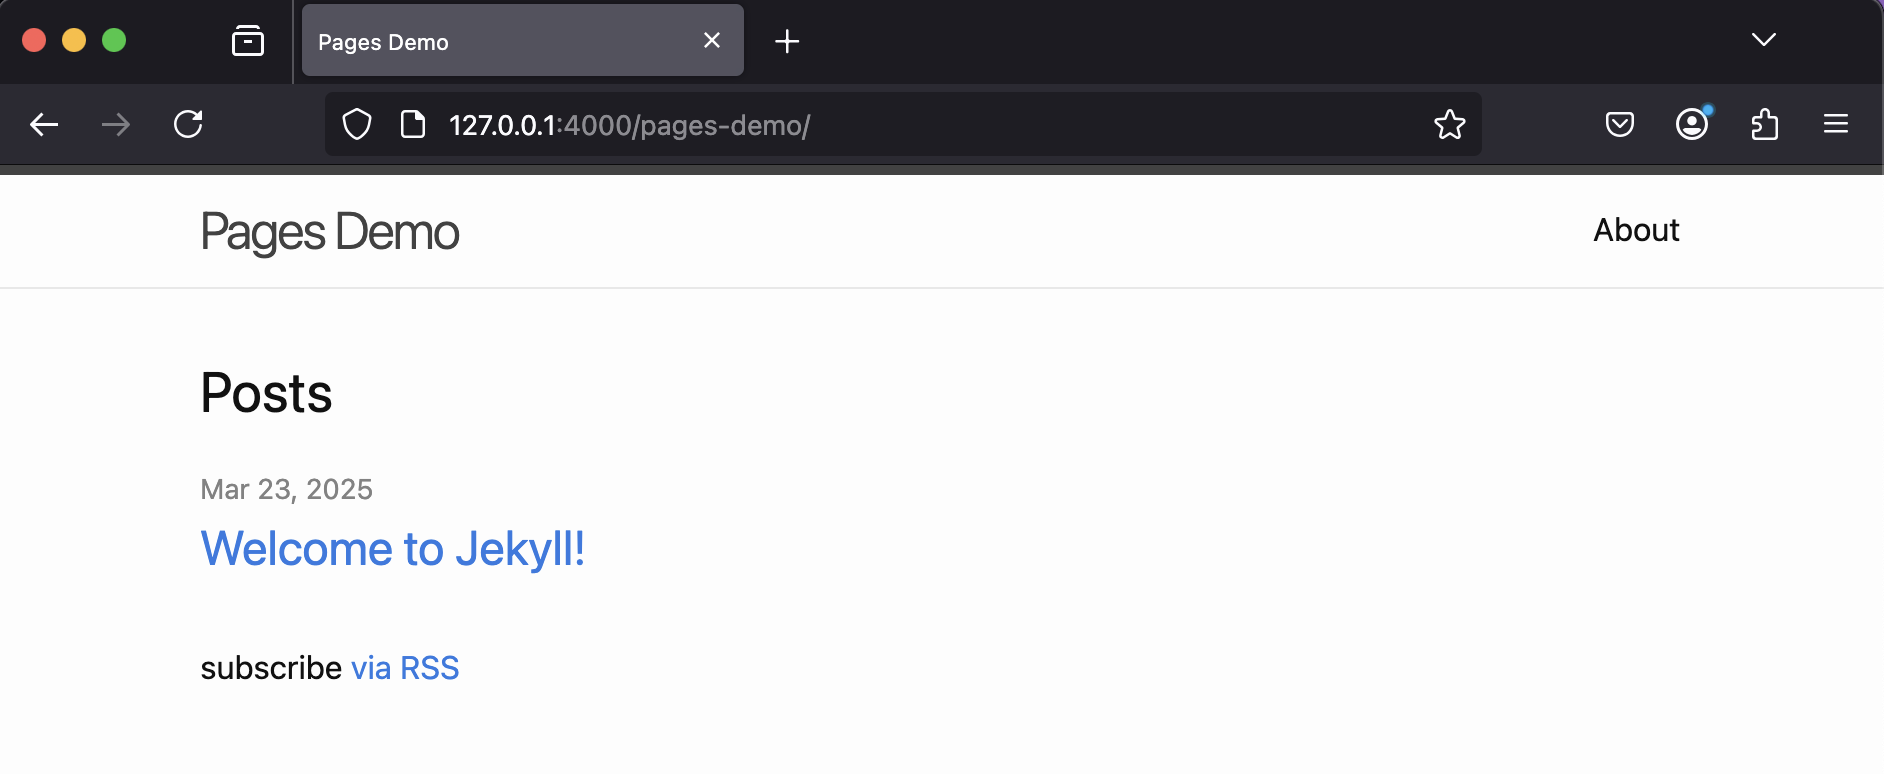
Test your site locally (see section below). If everything has been done correctly you should see the default Jekyll site with one “Welcome to Jekyll!” post.
-
Push your changes
 git add .
 git commit -m 'Initial Jekyll site'
 git push
I do not normally recommend
git add .due to the tendency to add/commit changes that you did not intend. You should, most of the time, use this step to specifically add changes that you have confirmed you want to apply. However, since the new Jekyll site creation has created a lot of new files for us, we are going to indescriminently add them all this time. -
Back in GitHub, verify that your changes have been pushed, and wait for the last deployment to have a green checkmark with either time now or some value of minutes ago.
-
In a new tab, navigate to the URL that you chose & configured (e.g. https://suddenlysixam.github.io/pages-demo/), and if everything has been done correctly you should see the default Jekyll site with one “Welcome to Jekyll!” post.

Testing your site locally
bundle exec jekyll serve
or to use a different port,
bundle exec jekyll serve --port 4001
In a web browser, navigate to http://127.0.0.1:4000. If you configured a subdirectory, add that onto the end (e.g. http://127.0.0.1:4000/pages-demo/), and if you’ve changed the port number update the 4000 to be the port you chose.
Adding a Theme
Now that we have a handle on building a deploying a basic Jekyll site with GitHub Pages, let’s get customizing! For the purposes of this project, we are going to be using a theme that allows us to build a resume, but there are many themes available. GitHub Pages supports a few themes by default, and you can also configure remote themes (non-default Jekyll themes hosted on GitHub) or themes included as Ruby gems. We will be using a remote theme for this project.
Live Resume
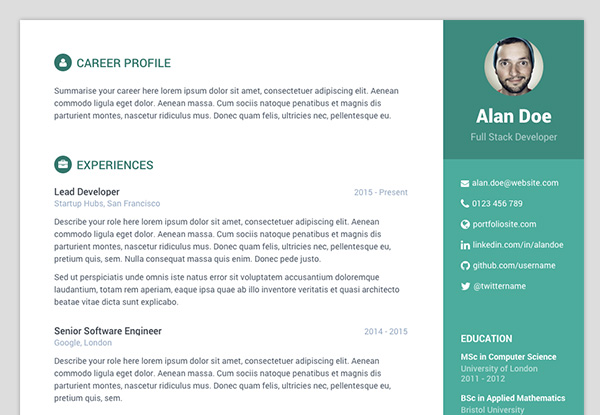
We are going to be using a theme hosted on GitHub: https://github.com/sharu725/online-cv
| Desktop | Mobile |
|---|---|
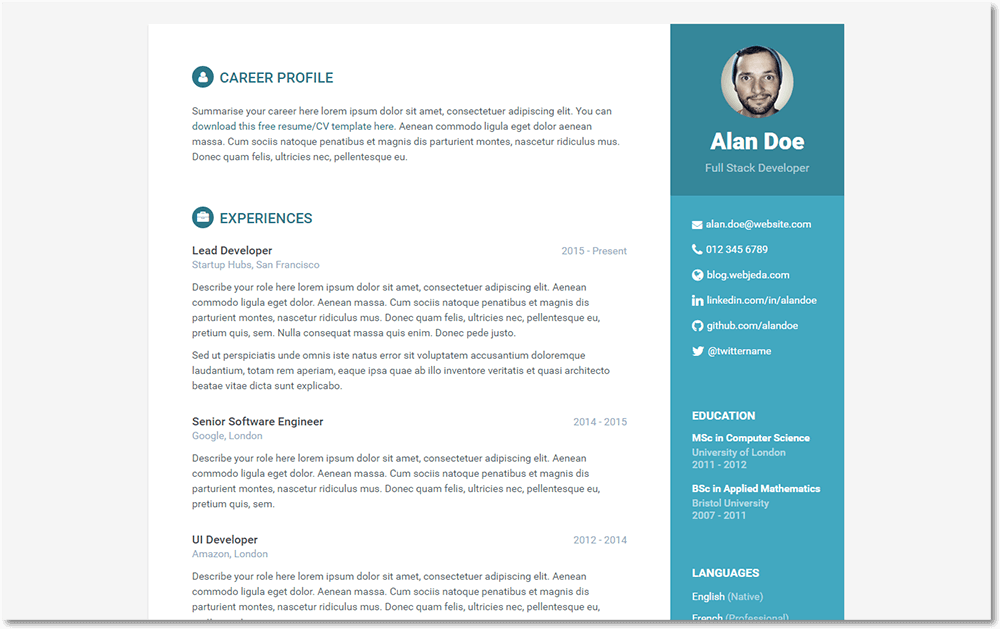
|
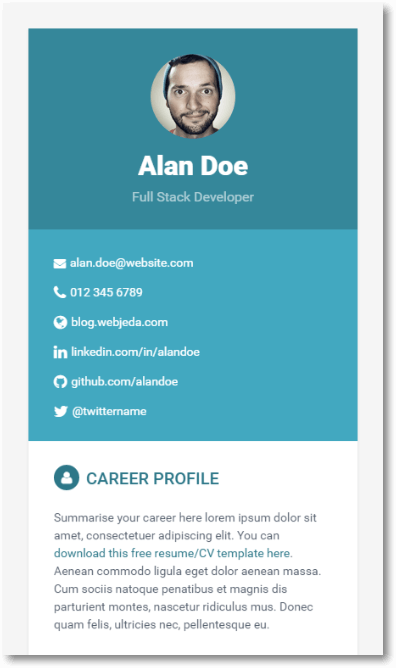
|
If you want to modify the theme itself, you could fork it. You could also fork the repository and make changes as the basis for your site. For this, we are going to use this theme as a remote theme within our _config.yml, and make changes that way.
Editing our config.yml
-
Lets first look at the
_config.ymlfrom the theme found here. Among other things, there is a line that we should add to our_config.ymltheme_skin: blue - Next in our
config.ymlcomment out the linetheme: minimaand add the line:remote_theme: sharu725/online-cvin order to use the new remote theme. - Now let’s test what we have so far locally and see what happens. You should at this point get some warnings that the layouts we have defined in our pages do not exist. That is because we have changed the theme, but have not yet adjusted our content to use this theme. Let’s do that next.
 Build Warning: Layout 'post' requested in _posts/2025-03-23-welcome-to-jekyll.markdown does not exist.
 Build Warning: Layout 'page' requested in 404.html does not exist.
 Build Warning: Layout 'page' requested in about.markdown does not exist.
 Build Warning: Layout 'home' requested in index.markdown does not exist.
Adding content
- Let’s take a look at the
index.htmlfrom the theme found here. We can see that it has a layout “default” and uses some Liquid stanzas (surrounded by{% ... %}) to include some other files. Let’s download or copy this file and use it in its entirety. You can copy/paste, download from the user interface in GitHub, orwget https://raw.githubusercontent.com/sharu725/online-cv/refs/heads/master/index.htmlor
curl https://raw.githubusercontent.com/sharu725/online-cv/refs/heads/master/index.html > index.html - We will also at this point want to clean up our test files a bit. Delete the files
index.markdown(which now conficts with our newindex.html), the defaultabout.markdown, and the default test post_posts/2025-03-23-welcome-to-jekyll.markdown.git rm index.markdown about.markdown _posts/2025-03-23-welcome-to-jekyll.markdown - Lastly change the theme in
404.htmlto be a valid one from our new theme.defaultis fine for this. In the frontmatter (the section at the top surrounded by---), changelayout: pagetolayout: default. -
Now let’s once again test what we have so far locally and see what happens. It should run relatively cleanly without any layout warnings.
You may get a warning about
GitHub Metadata. You can ignore this at this point. -
In a web browser, it should look something like this. The theme is taking shape! But we still have no actual content.
- Taking a look back at the
index.htmlthat we used, let’s take a deeper look at one of the files that are being included to figure out where we need to add our content. For example, the first file included ({% include career-profile.html %}) found here.- We see a mix of Liquid & HTML that is building this section of the content. And from the first line
{% assign career-profile = site.data.data.career-profile %}we can tell it is pulling this from the site data.
- We see a mix of Liquid & HTML that is building this section of the content. And from the first line
- Next, let’s take a look at the site data (
_data/data.yml) from the theme found here. This certainly looks like resume content for us to edit, and at this point we have found what we should customize. Let’s first use the file from the theme directly just to make sure it works. Create a folder_datain your project directory. Then in that directory, you can copy/paste, download from the user interface in GitHub, orwget https://raw.githubusercontent.com/sharu725/online-cv/refs/heads/master/_data/data.ymlor
curl https://raw.githubusercontent.com/sharu725/online-cv/refs/heads/master/_data/data.yml > data.yml -
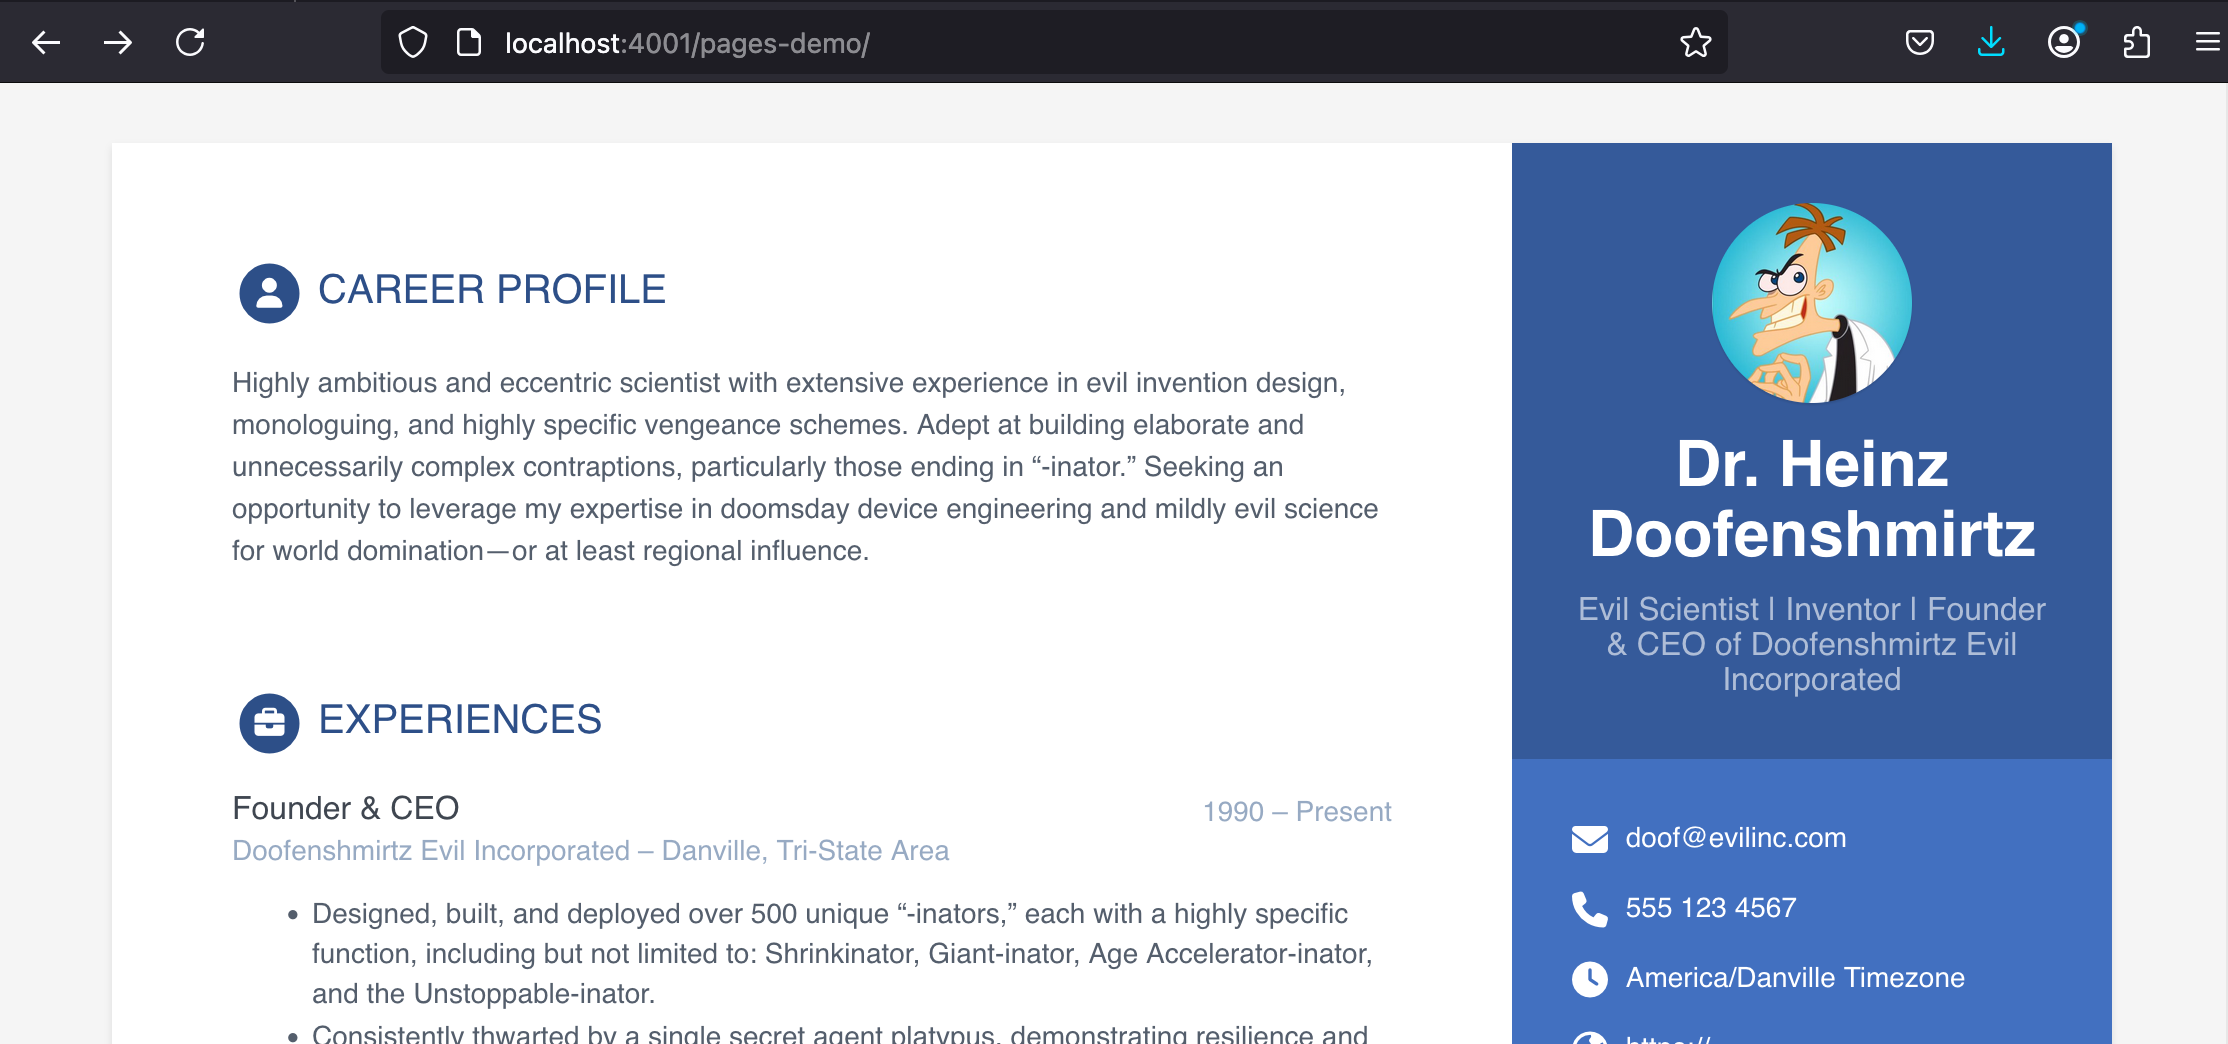
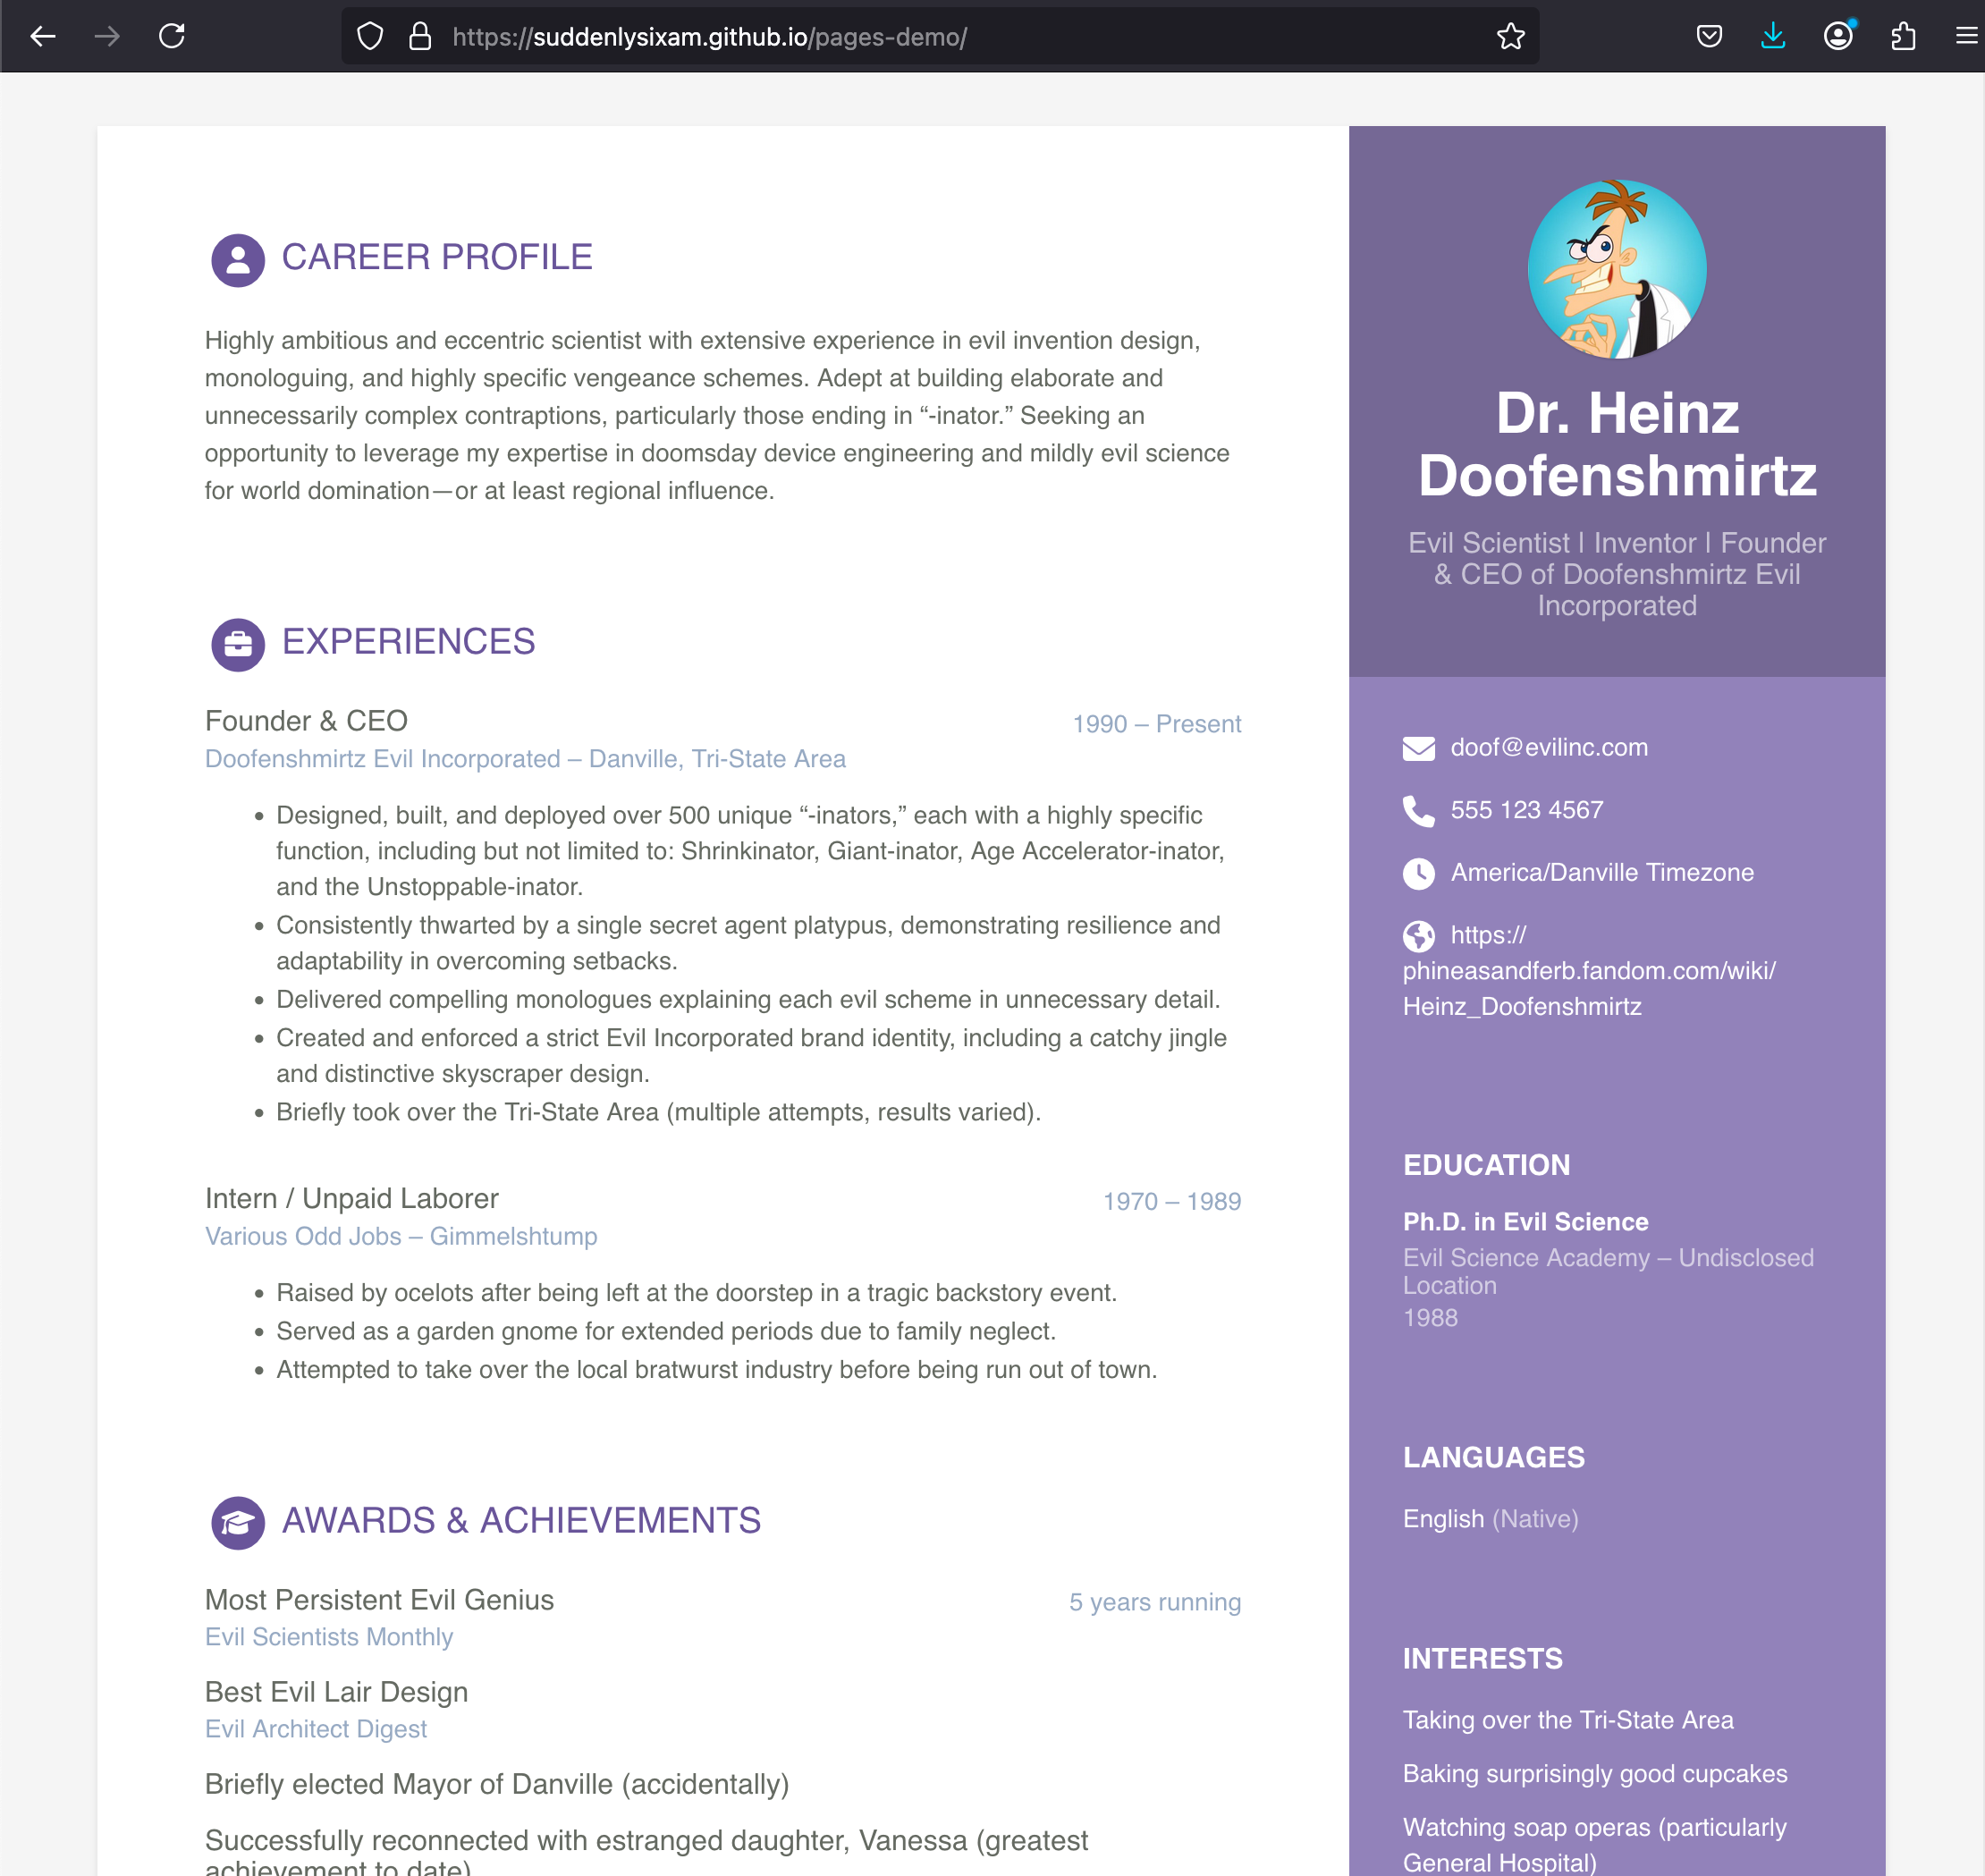
Now let’s once again test what we have so far locally and see what happens. In a web browser, it should look something like this, now with default content!
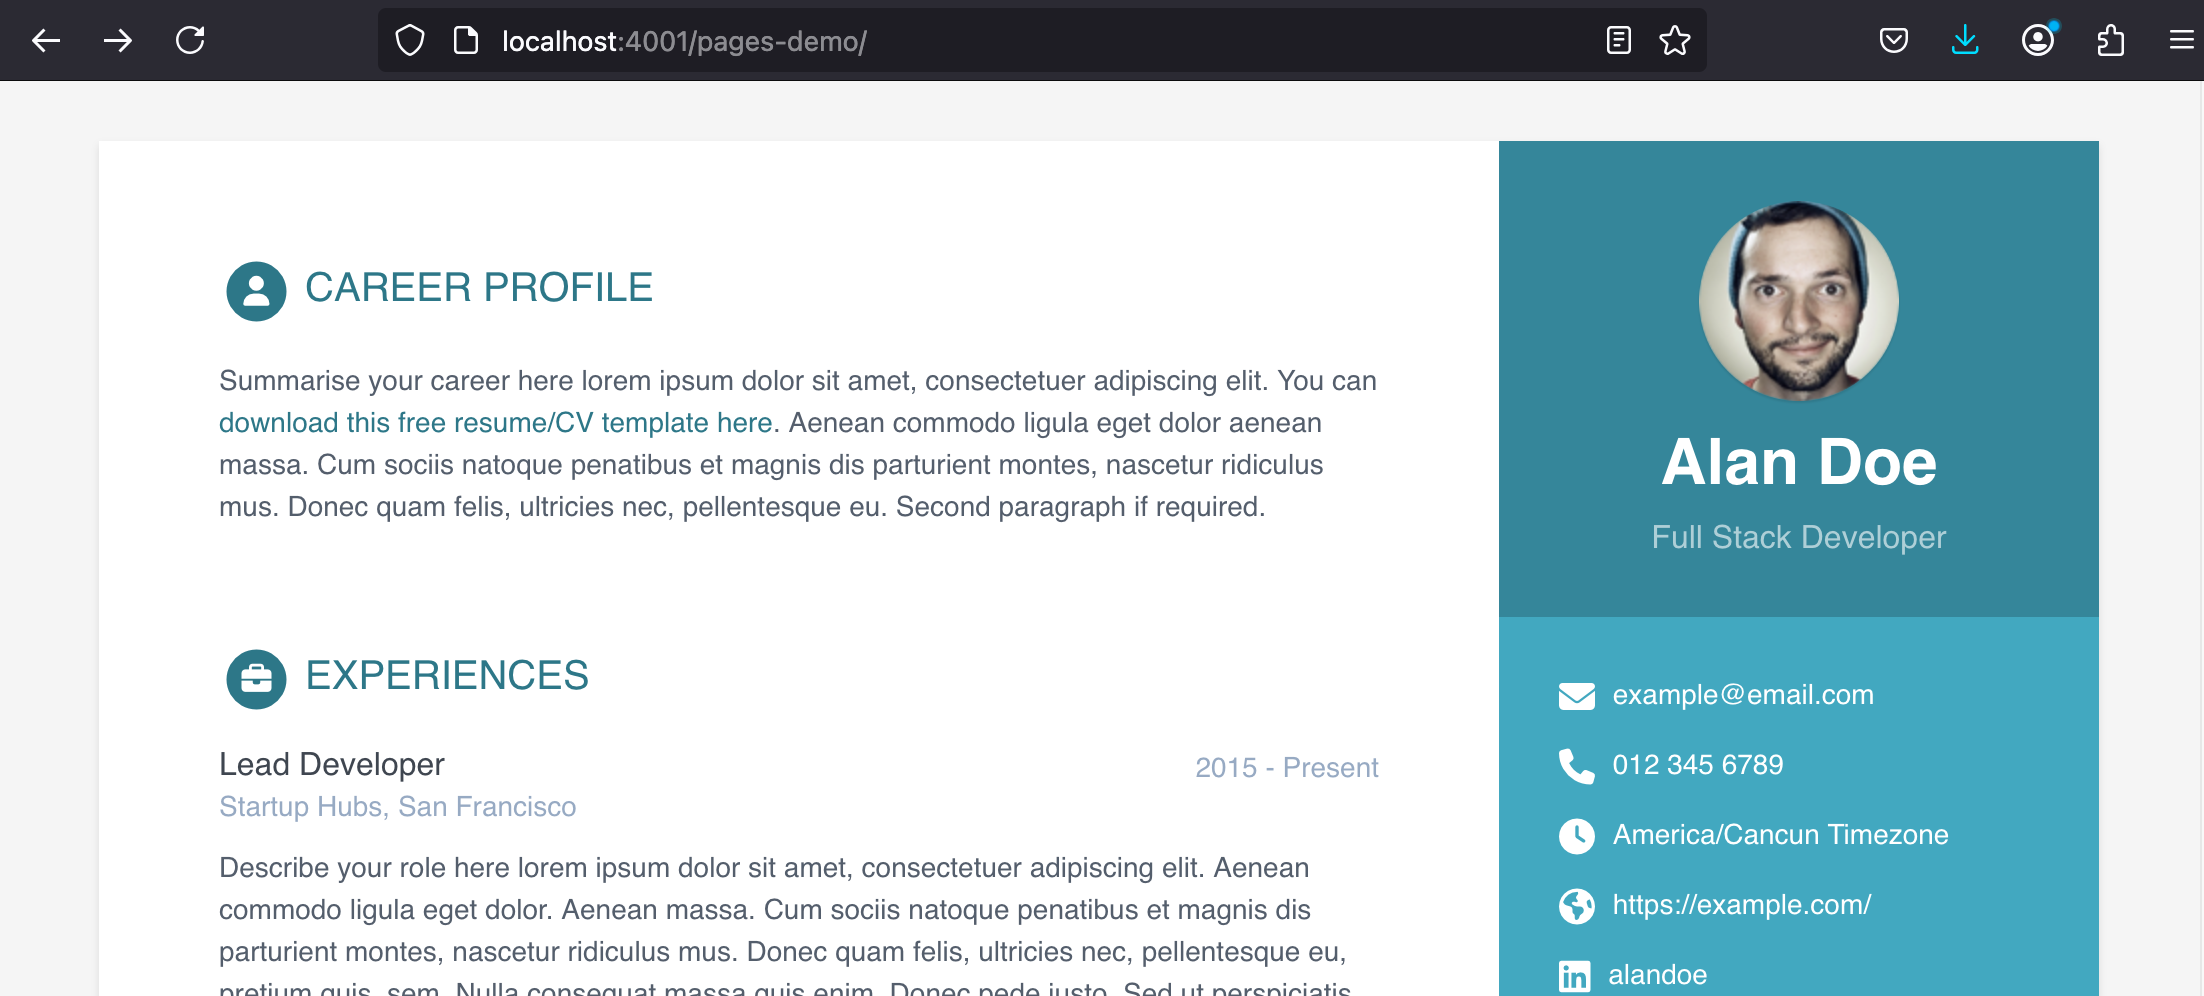
- Customize the content as you wish / to include your personal resume. Of note, you will also need to create the folders
/assets/images/and place a photo within to use in this line:avatar: profile.png #place a 100x100 picture inside /assets/images/ folder and provide the name of the file below- For example, the wonderful and 100% factual resume of Dr. Heinz Doofenshmirtz:
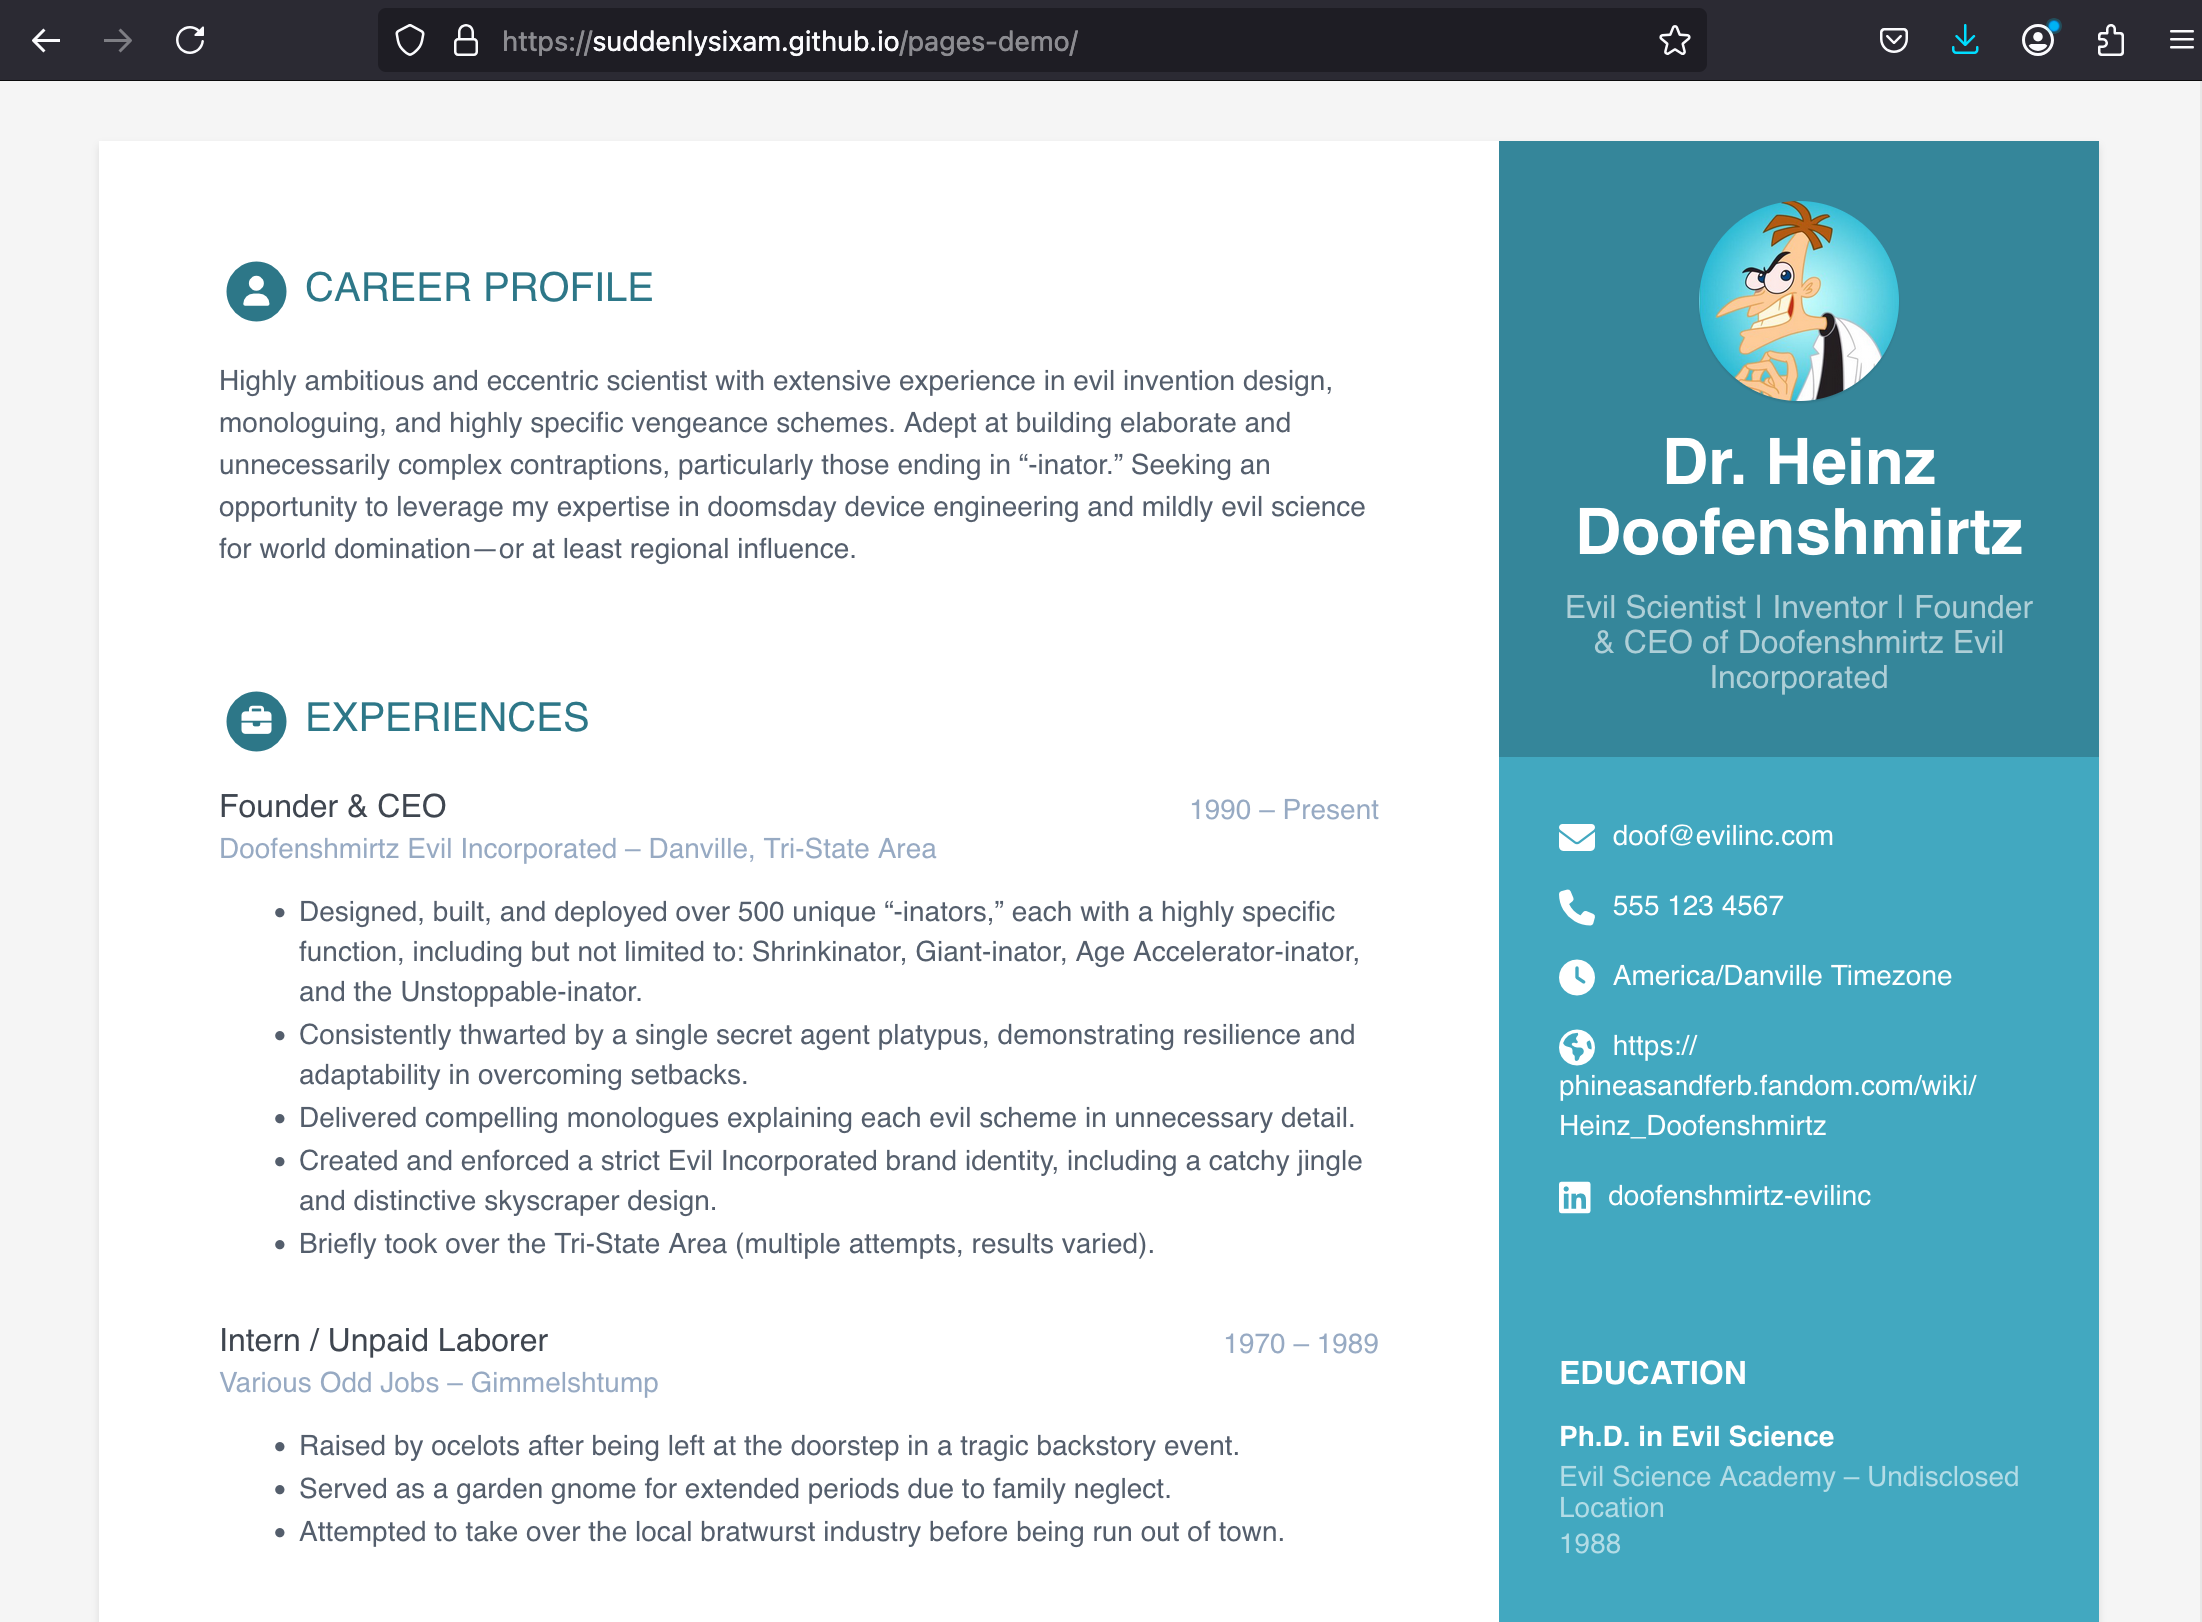
- For example, the wonderful and 100% factual resume of Dr. Heinz Doofenshmirtz:
Further customization
Content Order
What if you want to change the order of each of the sections? You can do so by changing the order which they are included in index.html. For example, you can move “Recommendations” to the bottom.
...

{% include skills.html %}

{% include recommendations.html %}
Color Scheme
What if you want to change the color scheme? Well the theme itself has a few available by default, which you can use by changing the theme_skin: blue line that we added to _config.yml to use the theme you like.
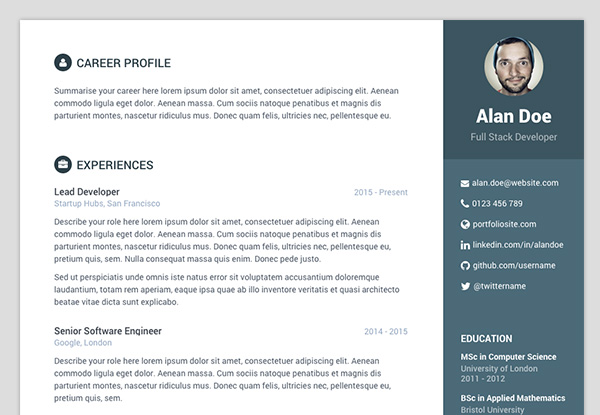
| Blue | Turquoise | Green |
|---|---|---|
 |
 |
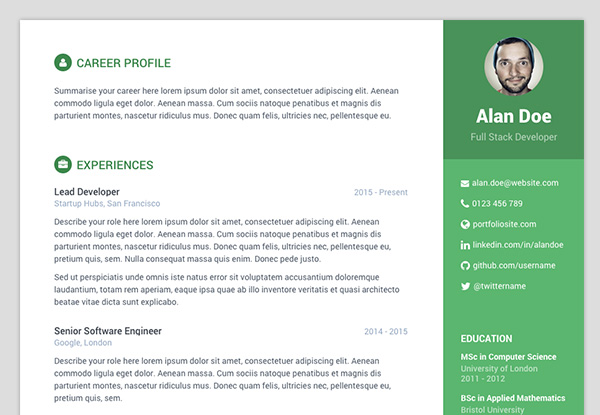 |
| Berry | Orange | Ceramic |
|---|---|---|
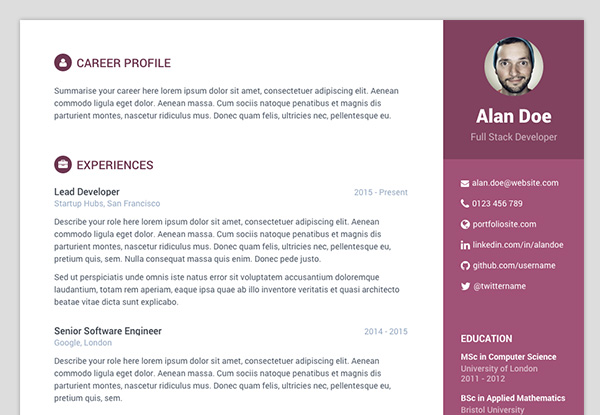 |
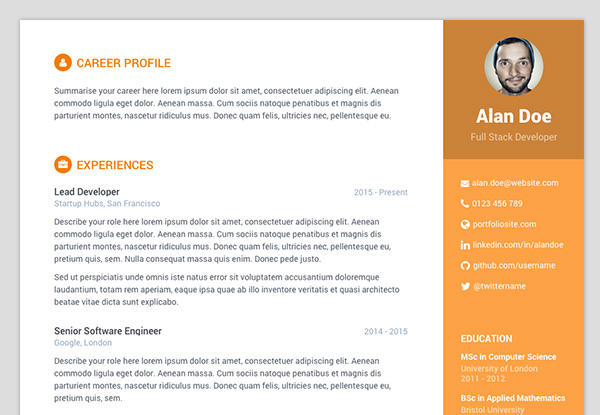 |
 |
However, we can also make our own. With remote themes, your local files will take priority over those in the remote theme. This allows you to “override” existing files, or add new ones for further customization. Let’s do this with a custom skin.
- Let’s take a look at the style file for the
bluetheme that we were using found here. While scss is proving to be the bane of my existence, this file is pretty simple. Create the folders_sass/skinsin your project directory. Then in that directory, you can copy/paste, download from the user interface in GitHub, orwget https://raw.githubusercontent.com/sharu725/online-cv/refs/heads/master/_sass/skins/_blue.scssor
curl https://raw.githubusercontent.com/sharu725/online-cv/refs/heads/master/_sass/skins/_blue.scss > _blue.scss - Start by changing the theme color. (e.g. change the following line to a different color)
$theme-color: #42A8C0;For example to a slightly different shade of blue:
$theme-color: #4270c0; -
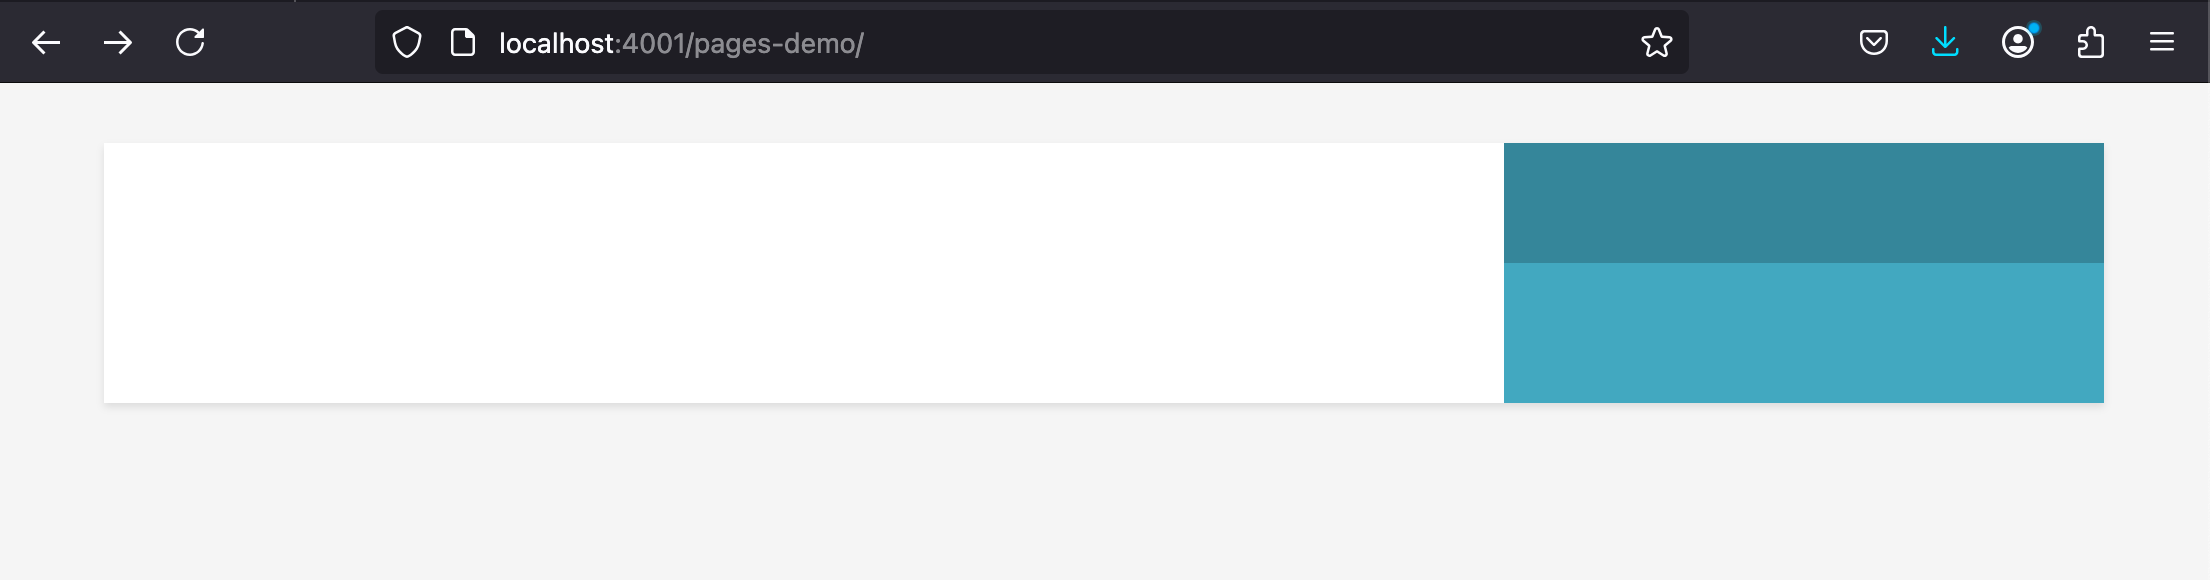
Testing locally, in a web browser, you should be able to see the color change of your overridden “blue” theme apply:
- We can then take this one step further, and make a new theme entirely.
- Change the file name to be the name of a new theme, for example
_purple.scss. - Within the file, make color changes as desired.
- In your
_config.yml, change the theme skin to your new theme, for exampletheme_skin: purple.
- Change the file name to be the name of a new theme, for example
-
Testing locally, in a web browser, you should be able to see your new theme apply:

Bring it back to GitHub pages
Once you have made changes that you like, remember to add/commit/push your changes to GitHub and make sure they show up correctly at the URL that you configured.
| Desktop | Mobile |
|---|---|
|
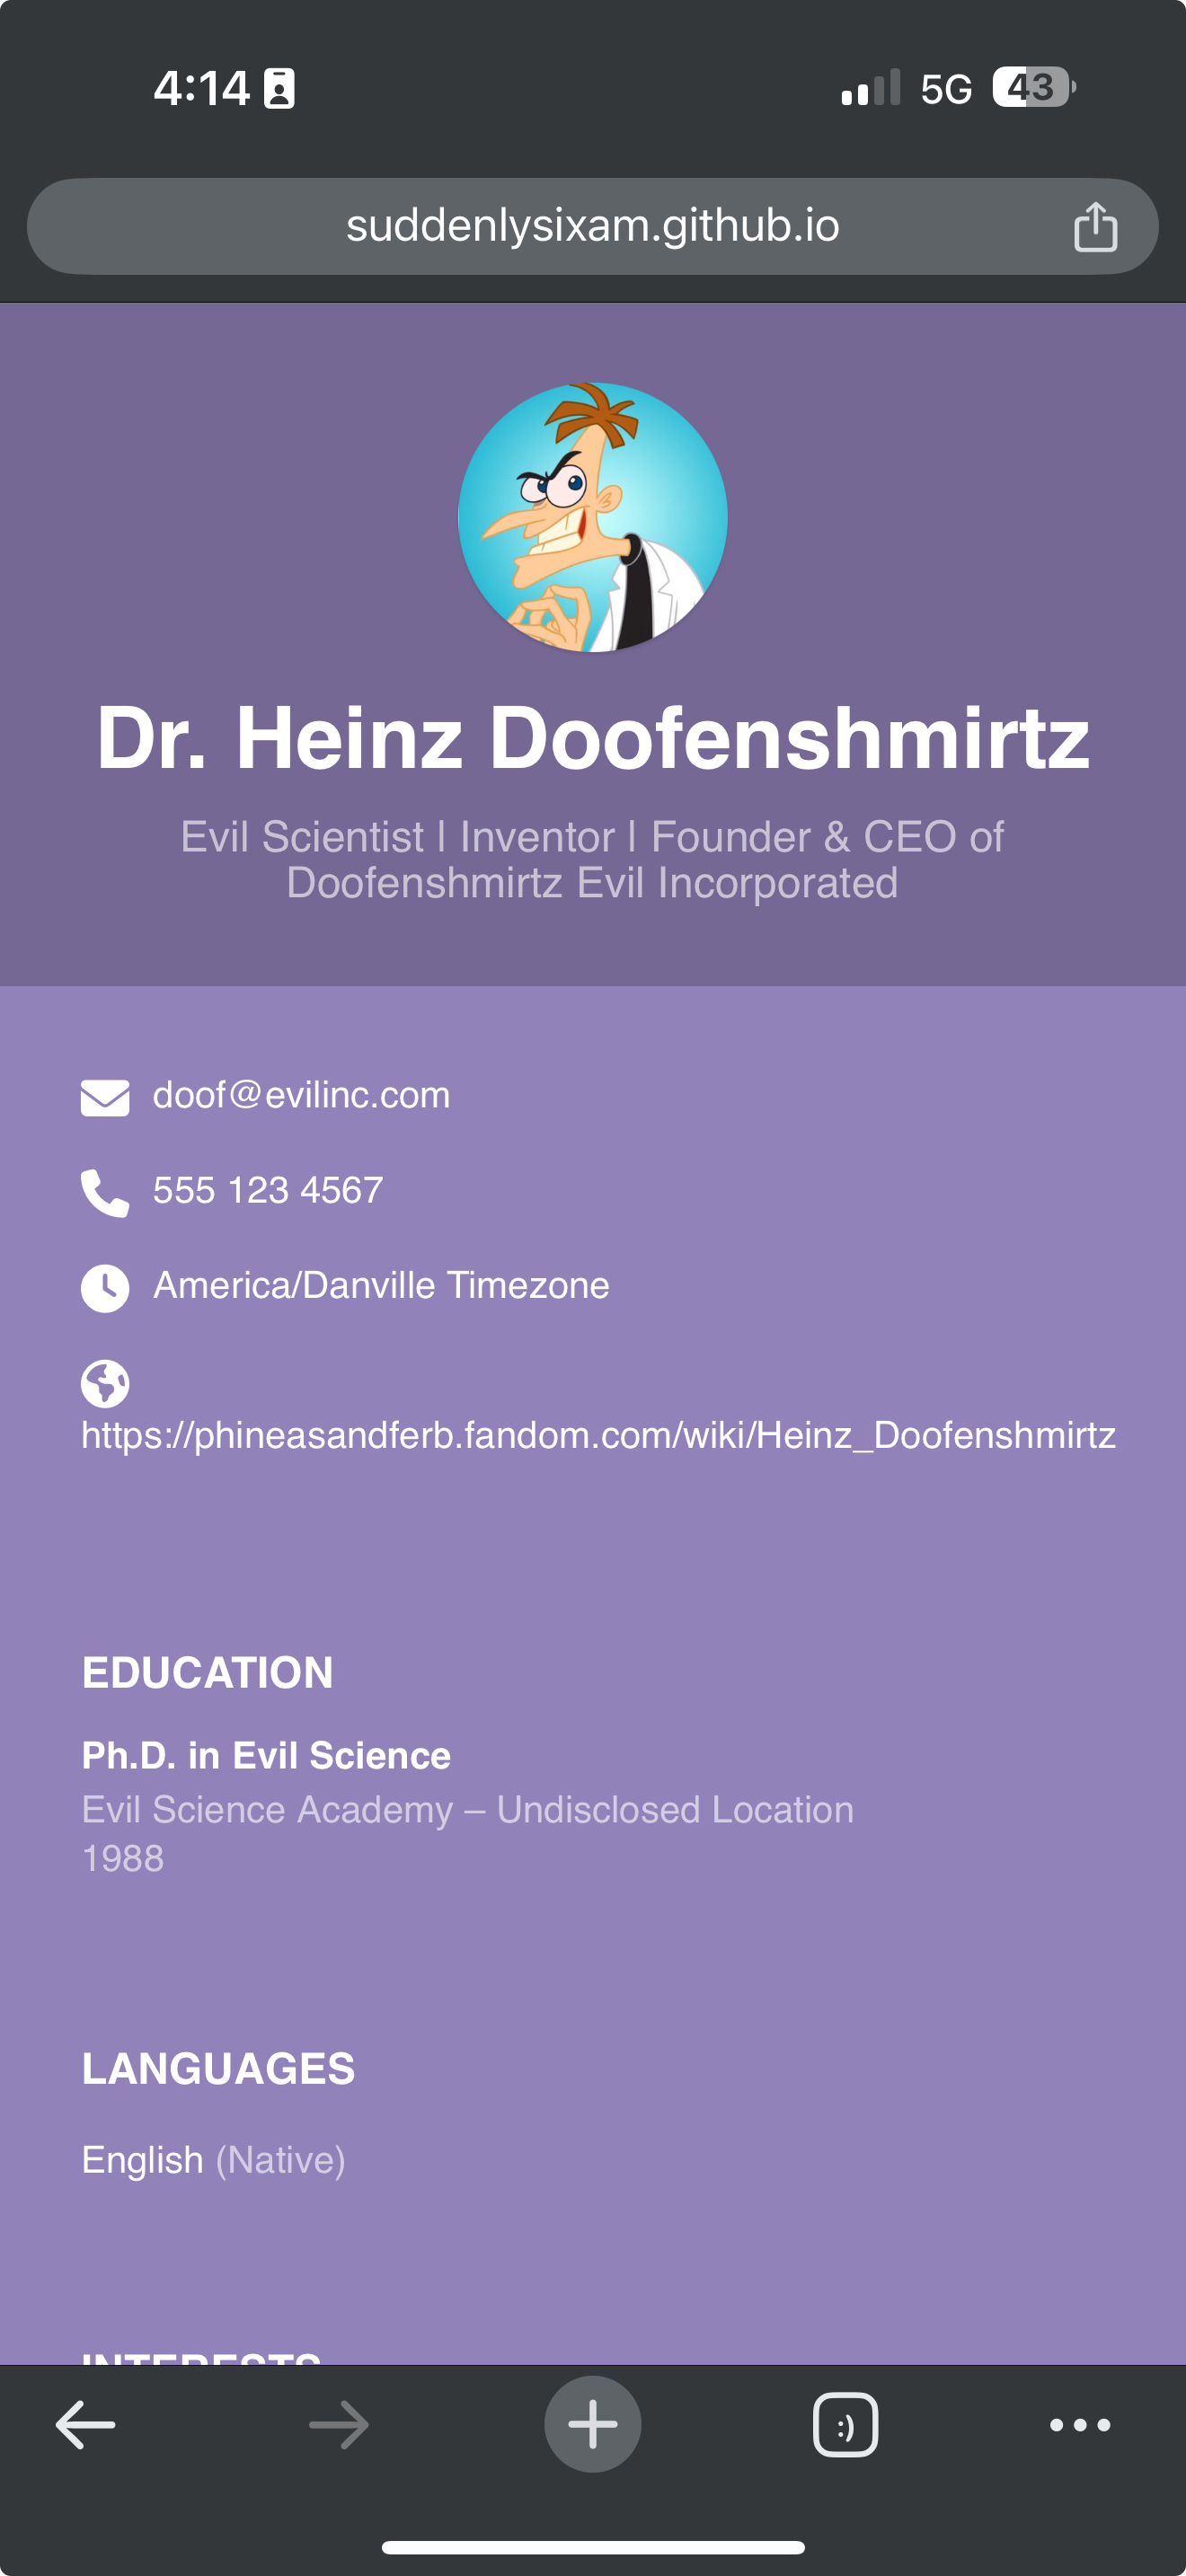
|
Final thoughts
There are many Jekyll themes other than the one we used here. There are different resume themes, as well as many other themes for blogs, documentation, personal sites, etc. Hopefully this has given you a taste of how to get started with GitHub Pages & Jekyll, so that you can go forth and create your own site(s) as you desire.